旋转的太极包含了这个世界的秘密,无论用啥录屏软件或者视频制作软件,都不好做出我期望的效果,于是我自己用代码写了一次,可以自己控制所有的逻辑。本文告诉大家如何使用 WPF 写一个旋转的太极
先在 XAML 绘制一个太极
在 XAML 创建一个放入到 Viewbox 的 Grid 作为画布,放在 Viewbox 是方便缩放,里面的坐标可以使用绝对值
            <Viewbox Stretch="Uniform">
                <Grid Width="100" Height="100">
                </Grid>
            </Viewbox>
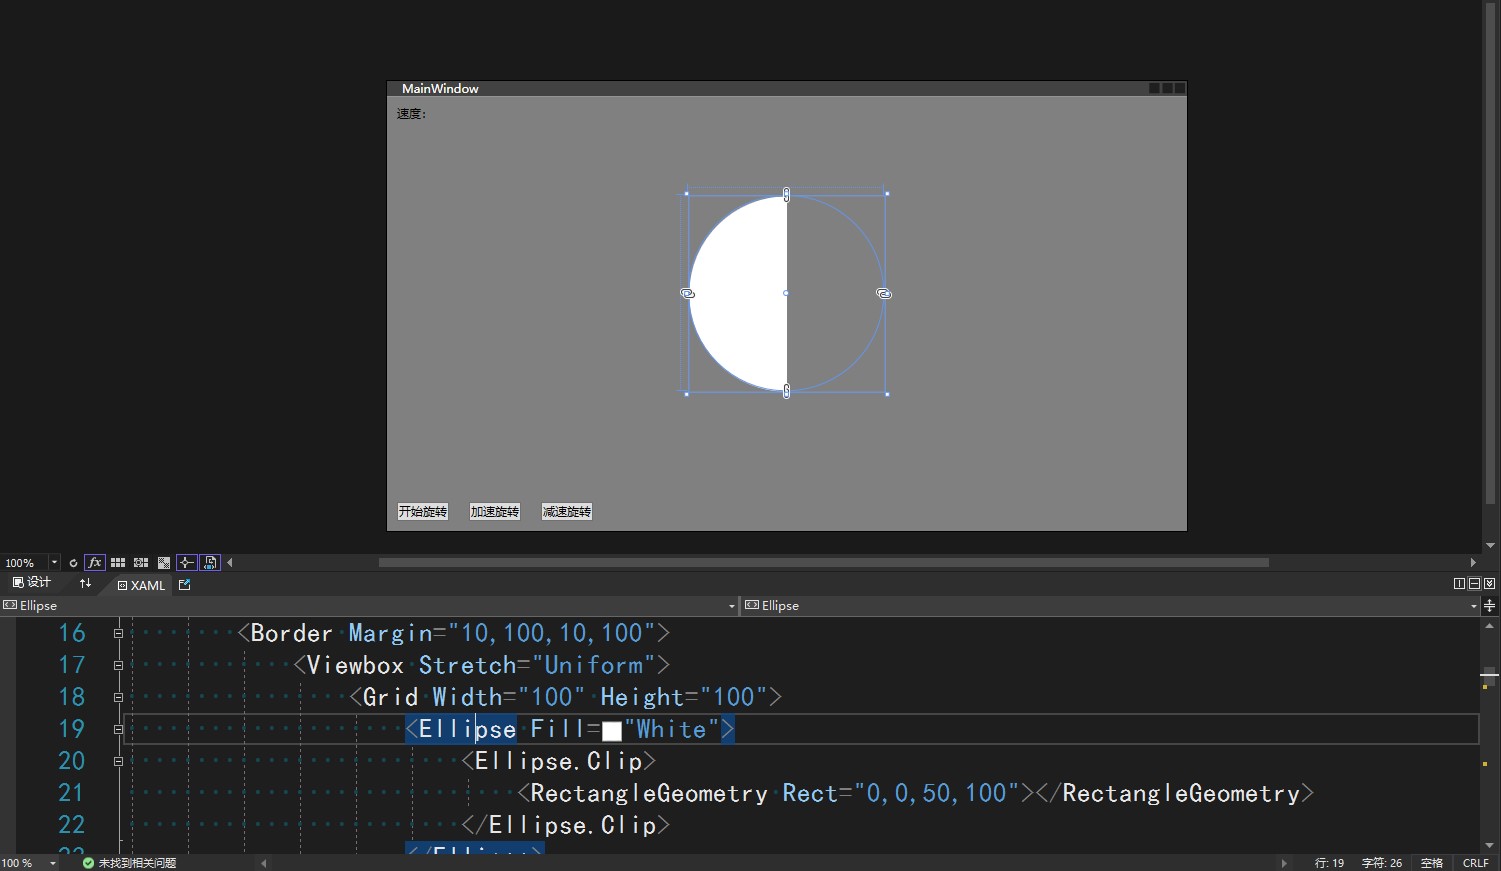
在 Grid 先画一个半圆,白色的半圆,如下面代码
                    <Ellipse Fill="White">
                        <Ellipse.Clip>
                            <RectangleGeometry Rect="0,0,50,100"></RectangleGeometry>
                        </Ellipse.Clip>
                    </Ellipse>
画半圆的方法就是画一个圆,然后裁剪一半
用相同的方法,画出黑色的底色
                    <Ellipse Fill="Black">
                        <Ellipse.Clip>
                            <RectangleGeometry Rect="50,0,100,100"></RectangleGeometry>
                        </Ellipse.Clip>
                    </Ellipse>
接着再添加其他的圆
            <Viewbox Stretch="Uniform">
                <Grid Width="100" Height="100">
                    <Ellipse Fill="White">
                        <Ellipse.Clip>
                            <RectangleGeometry Rect="0,0,50,100"></RectangleGeometry>
                        </Ellipse.Clip>
                    </Ellipse>
                    <Ellipse Fill="Black">
                        <Ellipse.Clip>
                            <RectangleGeometry Rect="50,0,100,100"></RectangleGeometry>
                        </Ellipse.Clip>
                    </Ellipse>
                    <Ellipse Width="50" Height="50" VerticalAlignment="Top"
                             Fill="White">
                        <Ellipse.Clip>
                            <RectangleGeometry Rect="0,0,50,100"></RectangleGeometry>
                        </Ellipse.Clip>
                    </Ellipse>
                    <Ellipse Width="10" Height="10" Margin="20" VerticalAlignment="Top"
                             Fill="Black">
                        <Ellipse.Clip>
                            <RectangleGeometry Rect="0,0,50,100"></RectangleGeometry>
                        </Ellipse.Clip>
                    </Ellipse>
                    <Ellipse Width="50" Height="50" VerticalAlignment="Bottom"
                             Fill="Black">
                        <Ellipse.Clip>
                            <RectangleGeometry Rect="0,0,50,100"></RectangleGeometry>
                        </Ellipse.Clip>
                    </Ellipse>
                    <Ellipse Width="10" Height="10" Margin="20" VerticalAlignment="Bottom"
                             Fill="White">
                        <Ellipse.Clip>
                            <RectangleGeometry Rect="0,0,50,100"></RectangleGeometry>
                        </Ellipse.Clip>
                    </Ellipse>
                </Grid>
            </Viewbox>
给 Grid 加上旋转,代码如下
                    <Grid.RenderTransform>
                        <RotateTransform x:Name="GridRotateTransform" CenterX="50" CenterY="50"></RotateTransform>
                    </Grid.RenderTransform>
再加上三个按钮,作为开始和加速等
        <StackPanel Grid.Row="1" Orientation="Horizontal">
            <Button x:Name="StartButton" Margin="10,10,10,10" Content="开始旋转"
                    Click="StartButton_Click"/>
            <RepeatButton x:Name="SpeedUpButton" Margin="10,10,10,10" Content="加速旋转"
                    Click="SpeedUpButton_Click"/>
            <RepeatButton x:Name="SpeedDownButton" Margin="10,10,10,10" Content="减速旋转"
                    Click="SpeedDownButton_Click"/>
        </StackPanel>
后台代码如下,加上依赖属性 Speed 作为速度
    public double Speed
    {
        get { return (double)GetValue(SpeedProperty); }
        set { SetValue(SpeedProperty, value); }
    }

    public static readonly DependencyProperty SpeedProperty =
        DependencyProperty.Register("Speed", typeof(double), typeof(MainWindow), new PropertyMetadata(0.0));
对应按钮的实现逻辑如下
    private async void StartButton_Click(object sender, RoutedEventArgs e)
    {
        while (true)
        {
            Speed = Math.Max(Speed, 1);

            var rotateValue = 0.1;
            var delayTime = 1000.0;

            delayTime = delayTime / Speed - Speed;

            delayTime = Math.Max(delayTime, 5);

            if(Speed > 10)
            {
                rotateValue += Speed / 10;
            }

            GridRotateTransform.Angle += rotateValue;

            await Task.Delay(TimeSpan.FromMilliseconds(delayTime));
        }
    }

    private void SpeedUpButton_Click(object sender, RoutedEventArgs e)
    {
        Speed++;
    }

    private void SpeedDownButton_Click(object sender, RoutedEventArgs e)
    {
        Speed--;
    }
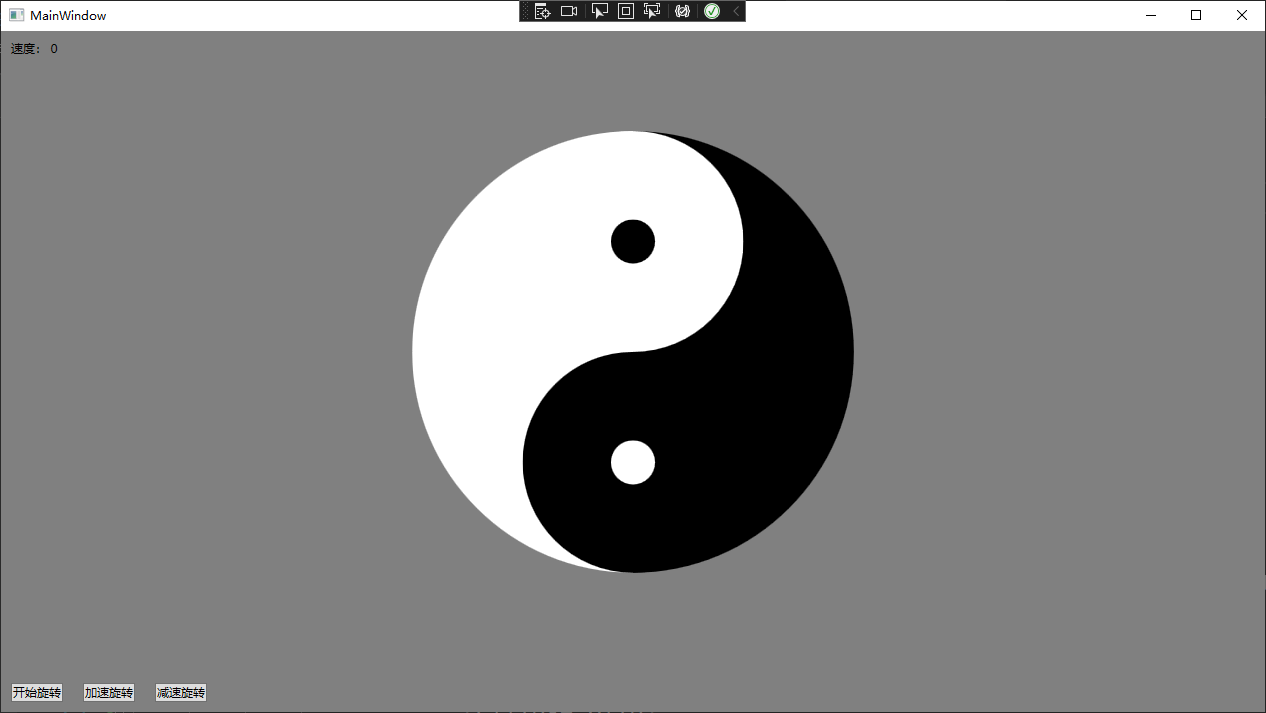
让代码跑起来,不断加速
可以通过如下方式获取本文的源代码,先创建一个空文件夹,接着使用命令行 cd 命令进入此空文件夹,在命令行里面输入以下代码,即可获取到本文的代码
git init
git remote add origin https://gitee.com/lindexi/lindexi_gd.git
git pull origin 15c60a5534f8c716c056ba181ac42c233c42256e
以上使用的是 gitee 的源,如果 gitee 不能访问,请替换为 github 的源
git remote remove origin
git remote add origin https://github.com/lindexi/lindexi_gd.git
获取代码之后,进入 CowhahiloRallkemnuke 文件夹
本文会经常更新,请阅读原文: https://blog.lindexi.com/post/WPF-%E6%97%8B%E8%BD%AC%E5%A4%AA%E6%9E%81.html ,以避免陈旧错误知识的误导,同时有更好的阅读体验。
如果你想持续阅读我的最新博客,请点击 RSS 订阅,推荐使用RSS Stalker订阅博客,或者前往 CSDN 关注我的主页
 本作品采用
知识共享署名-非商业性使用-相同方式共享 4.0 国际许可协议
进行许可。欢迎转载、使用、重新发布,但务必保留文章署名林德熙(包含链接:
https://blog.lindexi.com
),不得用于商业目的,基于本文修改后的作品务必以相同的许可发布。如有任何疑问,请
与我联系
。
本作品采用
知识共享署名-非商业性使用-相同方式共享 4.0 国际许可协议
进行许可。欢迎转载、使用、重新发布,但务必保留文章署名林德熙(包含链接:
https://blog.lindexi.com
),不得用于商业目的,基于本文修改后的作品务必以相同的许可发布。如有任何疑问,请
与我联系
。
无盈利,不卖课,做纯粹的技术博客
以下是广告时间
推荐关注 Edi.Wang 的公众号

欢迎进入 Eleven 老师组建的 .NET 社区

以上广告全是友情推广,无盈利